Stained glass is beautiful but fragile and brittle. Rough treatment or impacts with hard objects can easily crack the little pieces of glass that make up a stained glass panel. Do you need to replace the entire window? How do you repair cracked stained glass – find out in this article from a stained glass expert!
Cracked stained glass can be repaired in situ with UV, epoxy, or cyanoacrylate adhesives – saving the homeowner the high cost of panel removal & reinstallation Learn how to repair cracked stained glass in this informative article.
Stained glass windows in homes
Just waiting to get broken!
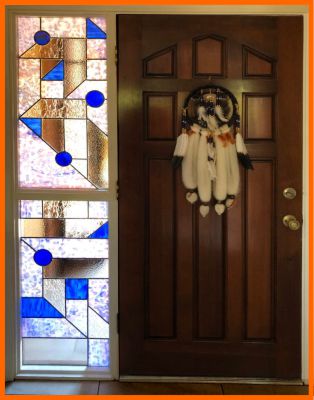
The commonest locations for residential stained glass are entryways – where homeowners, wishing to make an impression on their visitors, commonly invest in elaborate door panels or sidelights. Other locations for stained glass include bathroom privacy windows and skylights but by far the most prone to damage are door panels and sidelights.

Entryways are uniquely vulnerable to damage because they are high-traffic areas with family, friends, and strangers, coming and going (and potential intruders trying to break in!).
At Artistry in Glass, we have been fixing broken stained glass since 1986 and we never ceased to be amazed by how glass can get broken – culprits range from golf balls to pot-bellied pigs, from petulant toddlers to Irish Wolfhounds – jump to this section for the full list.
Learn more about how cracks occur in glass by jumping to this section.
Accidents will happen so be prepared! First: learn what to do if your stained glass gets cracked.
What to do if your stained glass gets cracked
- As a safety precaution, jump to this info on the dangers of lead poisoning before starting any stained glass repair project.
- Examine the damage carefully and take photos with your cell phone for insurance and repair purposes.
- Take close-up images of the cracks and also an overall view so that the repair company can evaluate the method of installation and the difficulties that may be involved. Include a closeup of the molding – the pieces of wood or metal used to hold the panel in place.
- Stabilize the window by covering the cracks with sturdy duct tape.
- Save any broken pieces that have become detached – they may be useful for color-matching of replacement pieces.
- Study this post to see if you can complete a home repair – otherwise,call local stained glass shops and email them images for advice. Tucson customers contact Artistry in Glass
Serious damage will require professional repair and unfortunately, with glass removal and reinstallation, typical costs exceed $1000.00. This is a substantial financial setback especially as many homeowners insurance policies carry a $500.00 or $1000.00 deductible.
So this article will show how minor cracks can be repaired by a competent homeowner but, before we explain, learn how to avoid the problem in the first place:
Avoid stained glass damage – install protective glass
These days, sensible homeowners guard against breakage by installing protective tempered glass on the outside (and in some cases, also on the inside) of their art glass panels. However, many panels installed before the mid-1980s are stand-alone and unprotected.

Homeowners with unprotected stained glass should consider retrofitting their doors and sidelights with sheets of tempered glass to protect against expensive damage.
As an Amazon Associate, I earn from qualifying purchases
Leaded glass sidelights are vulnerable to damage either accidentally or deliberately as in a burglary. We recommend installing protective tempered glass on the outside to guard against accidental or deliberate breakage.
Learn more about window treatments by reading this comprehensive guide
The problem of cracked stained glass
Why is cracked stained glass tricky to fix?
Most stained (strictly leaded) or beveled glass windows are made by connecting separate pieces of glass with “H-shaped metal (generally lead but also zinc, brass or copper) came as shown in the drawing below:
To replace a piece of cracked stained glass, the panel must be taken apart so that the broken segment can be taken out.
The main expense of most stained glass repairs is therefore the labor involved in removing the panel, boarding up the opening, transporting the window to the workshop, and returning to re-install the restored panel.
Can a crack be repaired in place?
In view of the high cost of removing the damaged panel – what are the alternatives? Can an effective repair be made with the window left in place?
Yes – several options are available:
- Remove the damaged piece and replace it (some soldering skill is required).
- Glue the cracked glass together using a variety of adhesives.
- Cover the crack with adhesive tape to match the lead came.
Remove and replace the broken piece
A reasonably handy person can remove a broken piece of glass from a leaded glass panel using pliers and screwdrivers or chisels. This is called the “drop-in” repair method by traditional glaziers.
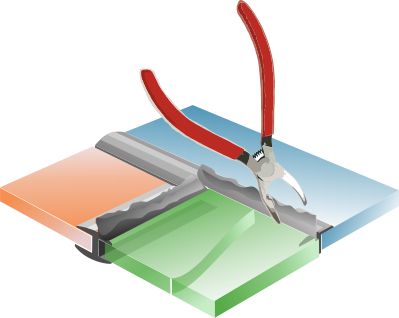
By carefully bending back the H-shaped lead a handy homeowner can remove the busted piece of glass. Take this piece to your local stained glass shop and ask them to cut you a replacement piece (make it very slightly smaller).
With some dexterity and skill, the homeowner can maneuver the replacement glass back into position and carefully bend the soft, ductile lead back into place.
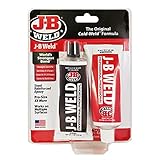

Do not be afraid! Even without soldering skills, you can coax the soft lead around the new glass. If the metal gets torn, use JB Weld to fill the gaps and strengthen the repair. Take your time and smooth the adhesive to match the profile of the old lead.
Note that this came-bending method is not possible if the came (normally lead) is made of harder metal like zinc or brass.
Glue the crack with adhesive
Many experts favor gluing instead of replacing glass, especially on older, valuable windows where it may not be possible to match the original antique glass.
Skillful gluing can stabilize the panel and minimize the possibility of further damage. However, the visual appearance and perfection of the repair require considerable expertise: read on to learn the tricks of the trade.
Preparation for gluing – it is very important to clean the cracked glass thoroughly before gluing.
Take great care because the invisibility of the glued joint will depend on the accuracy with which it is joined together. The crucial requirement for a perfect glue joint is to make sure the two broken pieces are lined up exactly. If there is dirt (a single molecule) in the crack, the repair will not be invisible.
The visibility of a glass crack is due to the reflection of light from the broken surfaces. When the microscopic gap between the two parts is filled with glue, the reflection disappears and the only sign of the crack should be a fine, almost invisible line.
The internal reflections, along this hairline crack, disappear as a low-viscosity adhesive is sucked in by capillary action. This adhesive is UV 7021, low-viscosity UV-activated glue from CR Laurence Co. (available here from Amazon).
For the most invisible glue joint, take care to clean and align the two broken pieces as perfectly as possible.
Choosing the correct adhesive
For most hairline cracks the best solution is to use a low-viscosity (runny) glue that will fill the crack by capillary action.
Professional glass workers swear by HXTAL NYL-1 Epoxy – an optically clear, 2-part adhesive available from specialist restoration companies (but not on Amazon). Hxtal is reported to be non-yellowing and provides very strong bonds in glass and crystal – it is, however, very expensive and has a long curing time (7 days to achieve 90% strength).
So, for the home crack repairer, we highly recommend either UV glue or straight superglue (buy the runny, not the gel)
Two adhesives recommended by Artistry in Glass

Highly recommended for strength and non-yellowing – but only use for hair-line cracks – it will not fill gaps. Set up in sunlight or using the lamp shown below:


The Loctite company is the original inventor of superglue and their Glass Glue is effective. Note that regular (generic) brands of superglue also work.


Our favorite UV lamp is compact but powerful enough to set up UV glue in 30 seconds or less. Apply the glue by capillary action, align the pieces then shine the UV light (the closer the better).
Open or complex cracks
It’s important to understand that Hxtal, superglue, or UV glues will not fill cracks so if you have damage with cavities or spaces there are two alternate adhesive options.
Option #1 Epoxy
If the window is in a safe, protected, interior location, your best bet is to use a regular two-part clear epoxy like J-B Weld 50112 5 minute . Skillful amateurs can color-match by adding very small quantities of liquid or powdered pigment to one part of the 2 part epoxy before mixing. Fill the gaps with care, then smooth and clean the excess glue.
Option #2 Clear silicone
If the cracked panel is an exterior window, subject to flexing by the wind and weather, then a flexible adhesive is highly desirable. We like clear silicone RTV 732 by Dow Corning. It comes in small 2oz tubes, which makes it easy to work with, with little or no waste.
Clear silicone is especially effective for opalescent glass and can be colored, like epoxy, by adding small amounts of pigments. Carefully apply the silicone to the gaps/cracks and remove the excess with a sharp razor blade.


High-quality clear silicone is excellent for making flexible crack or gap repairs. Available here on Amazon.
Clean the excess adhesive
To complete the gluing, clean off the excess adhesive with a sharp razor blade. The main objective is to stabilize the glass to prevent further damage. We like to use the original glass wherever possible to preserve the authenticity of the art. If the crack is still offensive to the eye, consider adding lead tape as described below:
Cover the crack with adhesive tape
Used together with gluing, the addition of adhesive lead tape can successfully disguise a crack in stained glass.
Sometimes this extra lead-line trick is done during the manufacturing process. The stained glass expert can often tell when an unexpected crack has been fixed with lead came during the manufacturing process.

Spot the extra line! A broken leaf in this antique stained glass panel was fixed by inserting an extra lead line – saving the expensive and time-consuming process of re-painting and firing in the kiln.
The professional glass artist will cut a flat strip of lead from H-came, glue it over the crack, and solder it to adjacent lead lines to complete the repair.
In the case of Tiffany-style, copper foiled stained glass – the expert will add another foil line and carefully cover it with solder.
The amateur repairer can make do with adhesive-backed lead tape like the brand below:


Gallery glass instant lead lines, 18 Strips 24″ x 1/8″, are used to stick over and cover glass cracks. Double up the tape if necessary and use patina to match the finish with the original lead.
Use your skill and judgment to position the lead tape and consider adding “unnecessary” tape to an undamaged area of the panel if this will create a symmetrical design.
Finish your repair by cleaning & polishing
Use the advice in this post to clean and polish your restored stained glass panel. Always be gentle (do not press too hard) to avoid further damage.
How stained glass cracks
Glass is easily broken by impacts but can also crack as a result of faulty design. This corner of a historic 1900-era panel is from the Bradley House, built by Frank Lloyd Wright in Kankakee, Illinois.
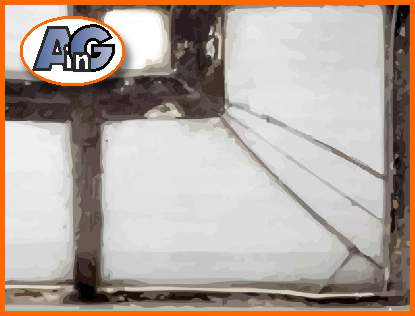
The cracks in this Frank Lloyd Wright panel are examples of unwise fabrication – the sharp “inside” angle is especially vulnerable to cracking. Historic photographs show that every single window in the Bradley House has cracks in these vulnerable corners.
It is interesting to imagine that the great architect, exhibiting early examples of youthful ego probably overruled the glaziers and insisted on this dangerous design in what was his very first Prairie-style house.
Serious cracks and missing pieces need the expertise of professionals like Artistry in Glass.
Study this video to see if your stained glass window is worth fixing:
The danger of lead
Lead in the form of came (channel) or in solder is an important part of a stained glass panel and lead is poisonous.
In summary: stained glass windows pose no threat to the homeowner providing simple precautions are taken. But, please read this post to learn all about the danger of lead in stained glass.

Lead is a dangerous poison, especially for young children and pregnant mothers! Take great care to wash your hands thoroughly after any contact with lead.
Unusual glass-breaking culprits
- Golf ball impact from a sliced drive on the 13th fairway.
- Vietnamese pot-bellied pig collides with a ming vase which hits the panel.
- The wagging tail of an Irish Wolfhound.
- A petulant toddler dissatisfied with her happy-meal premium throws it against the window.
- Teenagers playing catch with a baseball.
- Teenagers playing basketball in the foyer.
- A pebble ricochets from a lawnmower or strimmer.
- An ill-fated custodian drops a light bulb down onto a skylight.
- A domestic violence incident.
- A drunken resident stumbles against the door.
- A cleaner moves the Lazy-boy recliner just 1 inch out of place and the cat, jumping onto his normal position, rocks the chair backward to break a stained glass panel.
- An attempted burglary or home invasion.
In conclusion
If you have a crack in your stained glass window it may be possible to repair it, in situ, and save big bucks – by following the advice in this post.
Remember, never jeopardize the safety and security of your family by taking risks – be sure to contact Artistry in Glass at 520-320-0104 – if you are uncertain as to the best course of action.
Glass safety – learn from the experts!
- Choosing between tempered & laminated glass
- Broken glass injuries and how to avoid them
- Is wired glass safe?
- What is safety glass?
- What is tempered glass?
- What is Gorilla Glass?
- Plexiglass vs glass
- Should glass shelves be tempered?
- Should glass tabletops be tempered?
- Is lead crystal dangerous?
- Is leaded (stained) glass dangerous?
- How to repair cracked stained glass
All you need to know about art glass
Commissioning stained and etched glass
- Stained glass designs from Artistry in Glass
- How to commission a stained glass window – complete advice
- How to commission an etched glass window
- How to choose the best stained glass design
- Etched or stained glass – which is better for your home?
- How much does stained glass cost?
- How much does etched glass cost?
Technical information
- Is leaded glass dangerous? Learn the facts.
- How to replace broken patio table glass
- Plexiglass and glass – what are the pros and cons?
- What is plexiglass used for?
- What costs more – glass or plexiglass?
- Preservation of stained glass in churches & synagogues
- How does stained glass get colored? learn from an expert!
- Is your broken stained glass panel worth repairing?
- How to protect stained glass in religious buildings
- How to care for and clean stained glass
- How to repair cracked stained glass
- What is Dalle de Verre?
- How to repair Dalle de Verre
- What to do about bowed & sagging stained glass
- How to care for a stained glass skylight
- Can my stained glass lampshade be repaired?
- What is the difference between sandblasting & etching?
- Obscure and frosted glass – all you need to know!
- How to save money when buying glass
- Glossary of important terms used in decorative glass
- 14 Ways to sell stained glass
- What is imitation or faux stained glass?
Guides to stained glass design
- Guide for designing abstract stained glass
- Why choose abstract contemporary stained glass
- How to design a Frank Lloyd Wright-style window
- Designing a WWII-era stained glass Waco glider
- Stained glass and Black Lives Matter
- How Is stained glass used today?
Artistry in Glass was your source for antique repair in Tucson
Check out this amazing selection of informative articles:-
- Where can I get antiques repaired?
- Are broken antiques worth fixing?
- How to fix a broken picture frame
- How to repair a broken china plate
- How to repair a broken china teapot
- How to fix a broken marble slab
- How to repair a broken china coffee mug
- How to repair a 2000-year-old sculpture
- All about repairing stained-glass lampshades
- How to care for your stained glass skylight
- How to repair Dalle de Verre
- Is stained glass worth repairing?
- To repair or toss out?
- Tucson crystal & china repair a division of Artistry in Glass
- What to do with broken antiques
- Is lead crystal dangerous?
- Repairing an antique Mexican statue
- Repairing religious statues
- The history of Swarovski crystal figurines
- How to find the value of a Swarovski Crystal figurine
- Have Swarovski crystal figurines lost value since 2009?
- How to collect Swarovski annual ornaments
- How to display Swarovski crystal figurines
- How to authenticate a Swarovski crystal figurine
- How to display Swarovski annual ornaments
- How to clean Swarovski crystal figurines
- How to repair a Swarovski crystal mouse
- How to repair a Swarovski annual ornament
- How to repair a Swarovski crystal train set
- Fixing broken wine glass stems
- How to clean cloudy glasses
- Why do wine glasses have stems?
- Swarovski Crystal Figurines
- How to repair a chip in a wine glass
- How to fix a scratched glass tabletop
- How to replace a broken patio tabletop
