Handy homeowners can save hundreds of dollars by installing their own sliding shower enclosure and one of the best bargains is the Delta brand available at Home Depot for less than $400.00. Follow the instructions in this post for insider tips and all you need to know about how to install a Delta shower enclosure from Home Depot.

What is the best choice of shower enclosure for a small bathroom?
The lack of space in a small bathroom makes a hinged door impractical, so sliding doors are the best solution. For frugal customers the standard aluminum sliding bypass enclosure is the most economical choice, Roller wheels, attached to the top of the glass, run along the inside of an extruded aluminum “header” as shown in the video below:
Trendy new sliding doors
For fashion-conscious customers – designers have invented a sliding door system where the rollers are exposed for a “see-all”, hi-tech look.
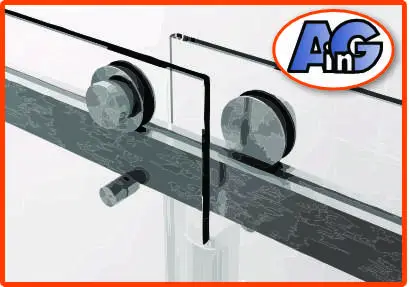
Our opinion is that function trumps esthetics and it is self-indulgent to pay twice as much just to see the wheels. The original design rolls just as smoothly as this new-fangled “improvement” so we recommend that you save money and stick to the basic Delta shower enclosure from Home Depot.
As an Amazon Associate, I earn from qualifying purchases
The Delta by-pass shower enclosure

Flat glass jumped 40% in shock wholesale price increases in July 2022 but sensible customers can still purchase glass at pre-increase prices by buying Delta shower kits from Home Depot and other stores. See this insider post for advice on how to save money buying glass.
Tools required
Most homeowners will already have the necessary tools and the only potentially challenging steps are drilling holes in the shower enclosure wall and cutting the aluminum to the correct size.
If your enclosure has stone or ceramic tile walls you will need carbide/masonry drill bits – otherwise (for acrylic enclosures) regular wood drill bits are OK. Jump to this section for insider tips on drilling holes in tile or stone.

The second slightly tricky step is to cut the aluminum header and footer to the correct width. Cutting will be quick and easy if you have a miter saw or even a grinder, but the standard method is with a hacksaw and a miter box. Use a metal file to smooth off the rough metal edges.
Measuring & layout tools
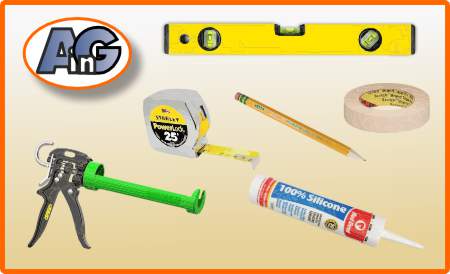
Other tools include a tape measure, a caulking gun with silicone caulk, and a spirit level (use a laser level if you have one), plus masking tape.
Safety & cleanup tools
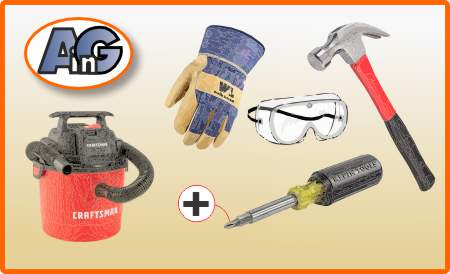
Never forget safety – use protective gloves and goggles and have a shop vac handy for clean up.
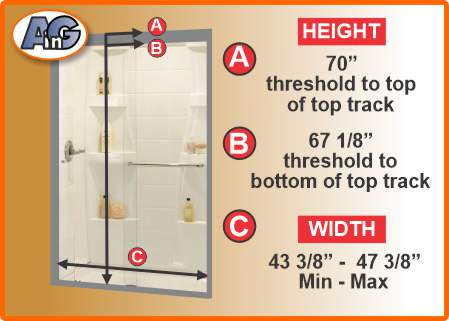
First, measure the width of your shower
Delta shower enclosures come in two sizes – about 60″ wide (for a typical “over the tub” shower) and, the size that we are describing here – 48″ wide for a standard acrylic/fiberglass enclosure.
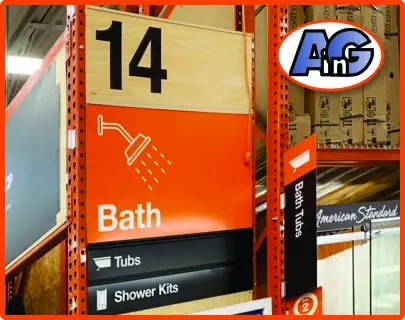
Purchase the Delta shower kit
The Delta shower enclosure is found in aisle #14 of our local Home Depot and currently retails for less than $400.00. Check on the side of the box to make sure the width (43 3/8 to 47 3/8) works for your shower.
This popular kit is also available at other big box stores but remember to act fast – we are sure that prices will rise substantially once the increased glass prices work their way through the supply chain.
Use the Delta, 3-step process to choose glass, metal & handles
Delta has a simple 3-step system to help you specify your sliding shower enclosure.
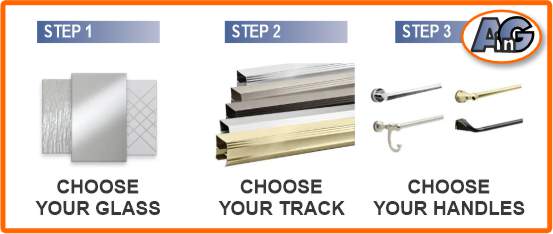
First choose from a selection of tempered glass including clear, rain, and other textures.
Second, choose your aluminum finish from polished chrome, brushed nickel, or bronze. Third, choose the finish and type of handles/towel bars.
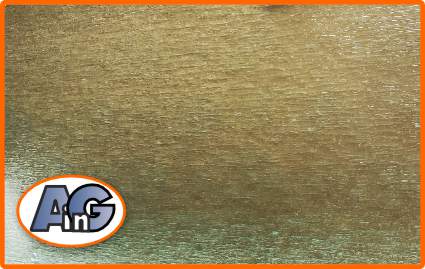
Online glass choices include, clear, and various etched and privacy options but our Home Depot only had clear and rain glass in stock. My wife chose rain glass because its rough texture provides privacy and also disguises any hard water stains that may form if the owner does not squeegee after use. However – remember you can apply surface protection to the interior side of the glass to prevent water marks – jump to this link for details.
Care of tempered glass
Examine the glass panels carefully when you unpack them at home and make sure there are no chips or edge defects (return to Home Depot if you find damage). Note – keep the black, triangular edge protectors on the corners until the glass is installed. Tempered glass is very strong but it will shatter into a thousand pieces if the sharp corner hits a hard tile or concrete surface,
Installing the shower enclosure
Unpack your shower kit and check to make sure everything is there. Pay special attention to the glass – if you find edge chips or defects – return the glass to the store.
Install the wall jambs
If you have a one-piece, acrylic, or fiberglass enclosure, the corners, where the walls meet the floor, may be curved and the wall jambs will have to be trimmed as shown below.
Otherwise, position the wall jamb against the side wall and the floor. (Note that the short side of the “H”- shaped jamb should normally face the wall, but it can be reversed if necessary).
Using a spirit- or a laser-level, double-check to make sure the wall jambs are plumb (the glass doors will not hang vertically if the wall jambs are crooked.)
Hold the wall jambs in position with tape while you drill three, 1/8″ diameter pilot holes through holes in the wall jambs, Remove the wall jambs and drill 5/16″ holes (for a tiled enclosure, use a 3/16″ diameter diamond bit). See this section for advice on drilling into tile.
Choose the correct anchors
It’s important that the side jambs are secured so use your common sense to choose the best wall anchors for your situation. (If there is a stud behind the tile or acrylic, you can screw directly into the wood.)
Having chosen suitable anchors, attach the wall jambs to the walls. Notice that the attaching screws are also used to hold rubber bumpers.
Cut the bottom track
With the side jambs in place, measure the length of the bottom track and cut it to size with a hacksaw or (much easier) with a miter saw. Do not make the fit too tight – allowing wiggle room of 1/8″ will make the fit easier. Use a metal file to smooth any rough edges.
The bottom track comes with a gray rubber gasket which must be inserted and cut to fit.
Run a bead of clear silicone along the underside of the bottom track and jam it in place (you may need to remove one of the side jamb screws and bumpers temporarily to make room).
Cut the top track
The top track fits flush against the walls and over the top of the wall jambs. So it is important o understand that the top track should not be cut the same length as the bottom track (it should be longer).
Measure the top track and cut with your hack saw or miter saw – (subtract 1/8″ from the tight measurement for easy installation). Always double-check your measurement before cutting!
** Note that the top track is reversible – you can choose the plain or grooved side to face the outside.
Check that the top track is level
Fit the top track over the wall jambs and check that it is level.
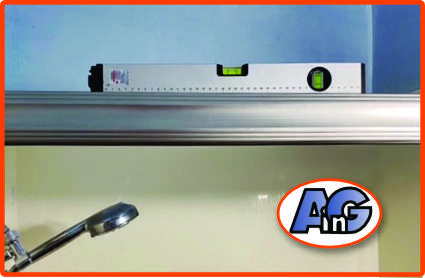
For the glass doors to slide perfectly, the top track must be level. If it is slightly off, adjust the lower end upwards with a suitable shim.
Attach the top track to the wall
The top track comes with a T-shaped strap or saddle designed to attach it securely to the wall.
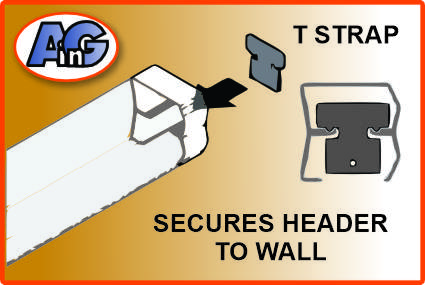
Fit the “T-strap” into the header and mark the position of the attaching screw. Drill a 1/8″ diameter pilot hole, then a 3/16″ hole to attach the saddle to the wall.
Hanging the glass doors
Now it’s time for the exciting step of hanging the glass doors:
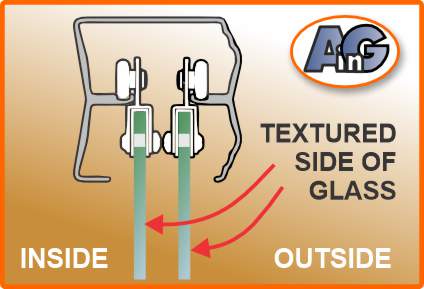
Study the glass and the hangers to figure out which side the rollers go on. If you have textured glass (like the rain glass above) – arrange for the smooth side of the glass to face the inside (wet side) of the shower.
To protect glass against chipping, install bushings into each glass hole. Then, install a screw into the smooth side of each hanger bracket and secure manually with a screwdriver (do not over-tighten).
If you have the rollers facing the correct way – you will have the result shown below.
If you have clear glass, there is a treated side (to resist water stains). This side should face the inside. Even if your glass is treated, it is a good idea to apply a surface protector – like this one from CR Lawrence.
To hang the doors, start by lifting and installing the interior panel. Then, carefully hang the exterior panel. Take extra care at this stage because the doors will swing free until the center divider is installed.
Adjusting the door heights
The Delta roller system has a simple design feature to enable you to raise and lower the glass doors if necessary.

Move the rollers to the best hole option to calibrate the door height.
Install the divider on the bottom track
To align and separate the two glass panels we need to attach a plastic divider to the bottom track.

Center the divider on the bottom track at the mid-point and align the doors with the divider. Drill 1/8″ pilot holes into the bottom track and secure the divider with the self-tapping screws provided. Do not over-tighten.
Install the towel bar
Delta provides options of either handles/knobs or, our choice, towel bars. These are simple to install but see the insider/pro tip below which is to put a dab of caulking on the outside 1/4″ of each towel bar before inserting it into the posts. The silicone stops the bars from rattling. Wipe the excess silicone off immediately.
Seal the shower frame with silicone
The final step in your magnificent shower installation is the seal the join between the metal frame and the shower with a bead of silicone.
We recommend running masking tape along the wall and the aluminum, applying a bead of silicone, squidging it into the gap then removing the tape to create a perfect straight-line border.
Protection from hard water staining
Some shower glass comes with special surface protection that resists the buildup of hard water stains. If you have lazy housemates, who will not squeegee the shower clean it is a great idea to apply this surface protection from the CRL company:-


This transparent polymer coating by the CR Lawrence company is not cheap but, applied to your glass shower door, will protect against hard water staining, Highly recommended by Artistry in Glass
How to drill holes in tile or stone
There are numerous carbide and other special bits available for drilling tile but we highly recommend going with the maximum hardness of diamond bits. This set below, from Amazon, is very affordable.
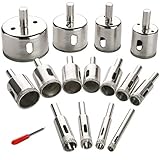

Diamond drill bit set – hole saw set for glass, marble, granite stone, and ceramic tile. Makes drilling holes easy
Do’s and don’ts of tile drilling
Do not use a hammer drill! The percussive action is OK for drilling in aggregate materials like concrete but definitely not for tile. You will very likely crack the ceramic and create an annoying repair challenge.
Do note mark marble with a felt tip pen! Inexperienced installers have made the expensive mistake of marking shower layouts in marble with a felt tip pen. The indelible ink will soak into porous materials like marble and be impossible to remove. Use masking tape on top of the tile, stone, or marble to make sure.
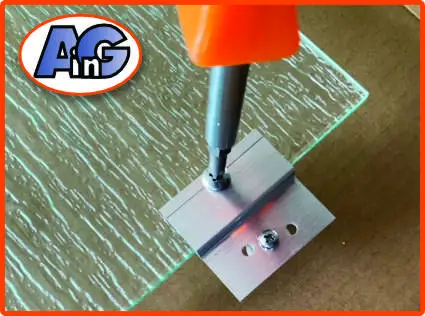
Using a diamond drill bit
Diamond bits (hole saws) are so sharp that they make short work of drilling in tile. For best results, start the bit at a slight angle to prevent skidding. Once the bit bites, rotate it to a position perpendicular to the work, Arrange for a spouse or assistant to spray water onto the work to lubricate the bit.
Use moderate pressure and drill speed and pause every 3 or 4 seconds to flush away debris and guard against overheating.
Glass safety – learn from the experts!
- Choosing between tempered & laminated glass
- Broken glass injuries and how to avoid them
- Is wired glass safe?
- What is safety glass?
- What is tempered glass?
- What is Gorilla Glass?
- Plexiglass vs glass
- Should glass shelves be tempered?
- Should glass tabletops be tempered?
- Is lead crystal dangerous?
- Is leaded (stained) glass dangerous?
- How to repair cracked stained glass
Glass tabletops & shelves – info from Artistry in Glass
- Benefits of glass shelving – info from experts!
- How much do glass tabletops cost?
- Do glass shelves need to be tempered?
- What is the best thickness for glass shelves?
- Best edge type for glass shelves, polished or beveled?
- How much weight can a wall shelf carry?
- What color glass should my shelves be?
- Glass tabletops – 10 amazing benefits explained
- How to order a glass tabletop
- Best thickness for glass tabletops – expert advice
- Should glass tabletops be tempered?
- Should glass tabletops be beveled?
- How to paint a glass tabletop
- All about tempering glass tabletops!
- How to tell if your glass is tempered
- Can tempered glass be cut?
- How to protect your wood table with glass
- How to fix a scratched glass tabletop
- How to fix a chipped glass tabletop
- How to replace broken patio table glass
- How to measure for a glass tabletop
- Video – how to measure your tabletop
- Plexiglass vs glass – pros and cons
- Beveled glass table base – a case study
- Choosing between tempered & laminated glass
- Glossary of terms used in the glass business
