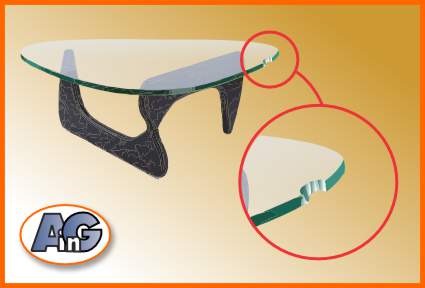
Your beautiful glass tabletop got chipped on the edge. Is it dangerous? Can it be fixed or do you need to purchase a new one? Find out how to fix a chipped glass tabletop with reliable info from glass professionals.
Glass is hard and strong but it is brittle and chips very easily if struck on the edge with a sharp object. Many websites claim to have solutions but the truth is that chips are almost impossible for the amateur to fix. Learn the truth about how to fix a chipped glass tabletop in this post from the glass professionals at Artistry in Glass.
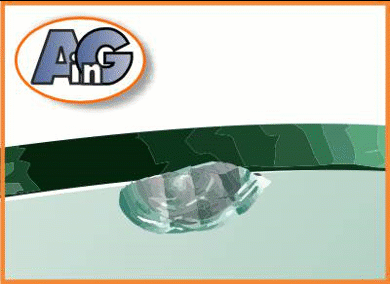
What is a glass chip?
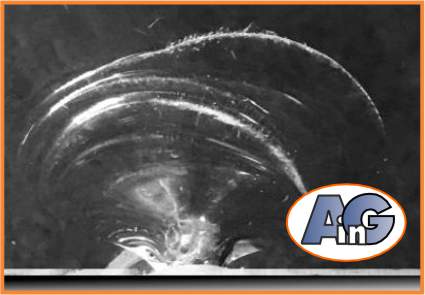
Glass is a unique material – often called a super-cooled fluid because it has a random molecular structure. Rapidly cooled volcanic rocks like obsidian also have glassy characteristics and break in what are known as conchoidal (shell-like) fractures that made them useful sharp tools in Neolithic times.
There is no magic way to make a chip disappear. The three best options are to glue the chip back, fill the chip with resin, or grind the chip down. All three methods have limitations and the sensible homeowner should be prepared to purchase a new tabletop.
If the appearance of the chip does not bother you, you can smooth the edges to make the tabletop safe to use.
Options for fixing chips
- Glue the broken chip back in place
- Fill the chip with clear resin to disguise the damage
- Grind and polish the edge of the table until the chip disappears
- Sand down the sharp edges to make the table safe to use
As an Amazon Associate, I earn from qualifying purchases
Glue the broken chip
If the damage is simple and no pieces are missing, it is possible to glue the chip back using a special type of UV-activated glass adhesive. Follow this link to find the best glass glue on Amazon.
Clean the damaged area thoroughly then do a “dry run” by placing the chip in position. When you are satisfied that you can locate the chip exactly, put a small drop of adhesive on the chip and press it into place. Take a moment to check that there are no air bubbles, then shine the UV lamp to cure the adhesive.
In practice, this is seldom a perfect solution because most chips are made up of multiple small fragments and small pieces of glass are likely to be missing. However, replacing the busted chip is a good start to the repair and if gaps are still present – use the resin-fill technique (described below) to complete the job.
Fill the chip with resin
Filling the chip with clear resin can help to disguise the damage but, in practice, it is tough to achieve an invisible repair. For best results take your time and follow the steps shown below:
1: Clean the chip
Remove loose glass fragments – finish by cleaning the chip with rubbing alcohol (this evaporates without leaving a residue).
2: Apply clear cellophane
Resin forms a perfectly smooth, glossy surface when it dries in contact with clear plastic, mylar, or cellophane, You can purchase transparent inkjet film like this but most households will have transparent plastic film left over from the wrapping of products. Stiff film (even a piece of clear sheet protector like this) works better than tissue film.
Cut the film to follow the shape of the chip and secure it firmly with masking tape. You need to form a “dam” to prevent the resin from seeping away from the chipped area.
3: Fill the chip with resin
We highly recommend this clear resin from Jdiction for chip-filling.

Ultraviolet-curing resin is non-toxic, crystal clear, and hard when cured in sunlight or with a UV lamp. Unlike many UV glues, this resin sets hard even without covering with film.
Arrange the table so that gravity will be your friend, and make sure the chip is in the shade (sunlight, even on a cloudy day) will cure the resin prematurely).
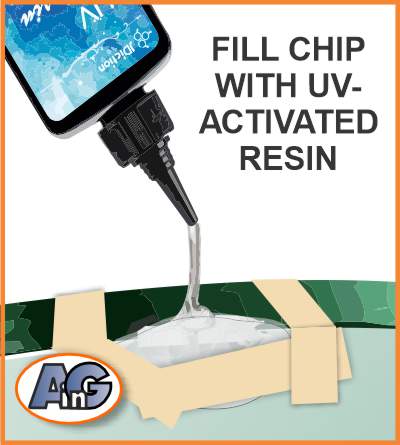
Drip the resin into the chip making sure to fill the entire volume. Try to avoid small air bubbles (you can remove bubbles with a clean toothpick). You have plenty of time, so relax and take care to use sufficient resin to fill the chip.
5: Cure the resin
When you are happy that the chip is filled it is time to harden (cure) the resin.
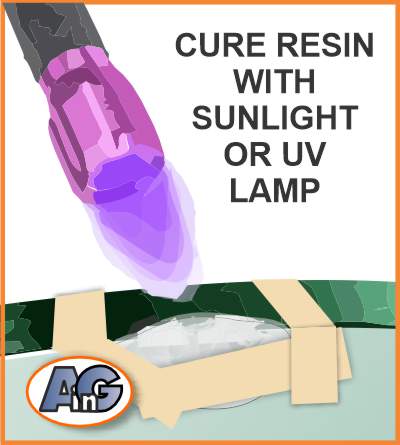
Exposure to sunlight is the easiest curing method (even on an overcast day) but if you cannot expose the chip to natural light, use a UV lamp. Jump to this section for our recommended LED UV lamp,
6: Trim resin with a razor blade
Very skillful and crafty homeowners may be able to arrange small pieces of film to completely cover all the surfaces of the resin but, in most cases, the top surface will have to be trimmed with a blade.

Notice that the glossiest surface is the one in contact with the cellophane. The trimmed area will be less perfect and can be improved by polishing with very fine (#400 to #1000) sandpaper and then sealed with clear nail polish.
7: Finishing the repair
Even the most skillful homeowner will find it hard to make the chip invisible and, if you are very picky, it might still be necessary to buy a new tabletop. Jump to this section for more detailed advice.
Grind and polish the glass
The best way to remove a chip is to grind and then polish the edge of the glass tabletop until the chip disappears.
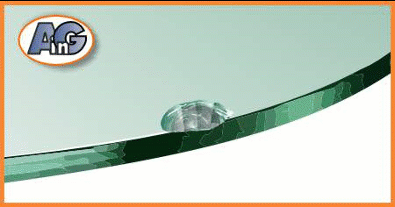
Note that polishing the edge of a glass table can theoretically completely remove a glass chip – but it changes the shape of the table (making it slightly smaller). This change of shape may not be too obvious on a curved top but will show as an indent on a rectangular table unless you polish the entire side.
Polishing in the glass industry
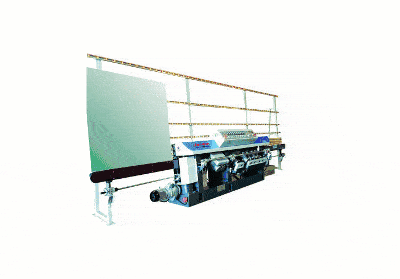
Edgework (polishing and beveling) is the name for polishing and beveling the sides of flat glass, Learn about edgework by following this link. These days glass polishing is done economically in the factory using large, expensive machines:
The problem for the homeowner with a chipped table top is that it is not economical for a local glass company to pick up your glass, schlep it all the way to the factory, and deliver it back to you.
So you have to try to polish the chip at home – not a simple matter. For best practices follow these tips,
Polishing chips at home
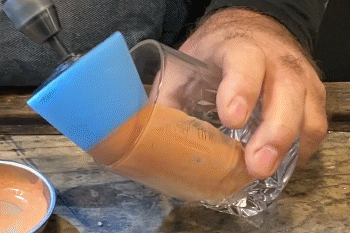
Chips are removed by sanding. Depending on the size of the damage, start with a coarse grit (#100) to get below the chip. Then use progressively finer grits to make the glass smoother and smoother.
Polishing by hand
For small chips, regular sandpaper on a sanding block is adequate but diamond pads like the ones below are much more effective.


CAPTOK Diamond sanding pads for hand polishing glass (and tiles, granite, etc). 4-piece set – with coarse to fine grits (60# 100# 200# & 400#).
If you have several sanding projects, these diamond pads will last almost indefinitely and will remove glass very quickly. Always use plenty of water to flush away the glass dust.
Polishing with a machine
For larger chips, a hand drill with diamond pads is much quicker than polishing by hand. Fortunately, polishing pads are available from the granite/marble industry – like this selection available on Amazon:
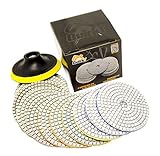

Wet diamond sanding polishing pads – one each for grit 50, 100, 200, 400, 800, 1500, 3000, and one backing pad holder with 5/8″ 11 female thread.
Using a regular hand drill, go down through the grits (using plenty of water), from #100 down to a pre-polish of #3000. Note that polishing is a process that requires patience – do not skip a git in your polishing sequence (otherwise you will end up simply polishing scratches).
Final polishing
Home-owners who just want to make the chip safe (ie remove the sharp edges) can stop at the fine sanding stage and smooth the sanded area with clear nail polish. For a perfect result, it’s necessary to do final polishing with pumice and then cerium oxide. Read this post for details.
Cerium oxide is the professional abrasive for the final polishing of glass. Use it on a foam, or even better, a felt pad. Polishing is most effective when heat is generated by carefully applying pressure (keeping the cerium lubricated with water).
UV Lamp for curing resin
There are numerous UV lights on Amazon but we find this handy little lamp to be strong and effective. Customers who are experienced with nail polishing may have their own UV lights – test them to save buying this one.


We recommend this 5V 8W USB-powered 395nm UV flashlight Ultra Violet LED for UV resin and glue curing.
Finishing the resin-fill repair
A fastidious homeowner will often be disappointed that resin does not make the crack disappear. One reason is that resin, although optically clear, has different physical properties to glass. In particular, the refractive index of the resin is not identical to that of glass. Resin is softer and has a slightly different color than glass.
Apart from the difference in properties, technical challenges make it hard for a non-expert to use resin successfully. The main problems are:
Air bubbles
It’s hard to fill a large chip without trapping small air bubbles in the resin.
Polishing the excess resin
The most perfectly smooth, glassy finish is achieved where the resin is in contact with smooth cellophane or similar film. The other surfaces have to be trimmed away and laboriously sanded and polished to create a glassy gloss. Follow this post to learn about polishing glass.
Best outcome
If you can diminish the visual impact of the chip – maybe flip the tabletop over (if it is not beveled) then the effort of resin-filling is probably worthwhile – especially with the recent increase in the price of glass.
But, be aware that it is almost impossible to make the chip invisible.
Useful products for glass cleaning
In our nearly 40 year’s experience in the glass business, we have identified two indispensable products for the removal of cloudiness in glass or crystal. First: study this post to figure out if the cloudiness is caused by hard water stains or by permanent etching. Then, choose from our recommended products below:
Water spot remover
Do not waste your time with vinegar, CLR, acetone, oven cleaner, rubbing alcohol, or other wacky household remedies – for hard water stains – use this guaranteed professional water-stain remover:


Polish for cloudy glass
For permanently etched, crystal or glass, don’t waste time with rice or baking soda – the solution is to polish with cerium oxide on a felt or foam pad. We recommend this kit (available on Amazon):


Glass tabletops & shelves – info from Artistry in Glass
- Benefits of glass shelving – info from experts!
- How much do glass tabletops cost?
- Do glass shelves need to be tempered?
- What is the best thickness for glass shelves?
- Best edge type for glass shelves, polished or beveled?
- How much weight can a wall shelf carry?
- What color glass should my shelves be?
- Glass tabletops – 10 amazing benefits explained
- How to order a glass tabletop
- Best thickness for glass tabletops – expert advice
- Should glass tabletops be tempered?
- Should glass tabletops be beveled?
- How to paint a glass tabletop
- All about tempering glass tabletops!
- How to tell if your glass is tempered
- Can tempered glass be cut?
- How to protect your wood table with glass
- How to fix a scratched glass tabletop
- How to fix a chipped glass tabletop
- How to replace broken patio table glass
- How to measure for a glass tabletop
- Video – how to measure your tabletop
- Plexiglass vs glass – pros and cons
- Beveled glass table base – a case study
- Choosing between tempered & laminated glass
- Glossary of terms used in the glass business